Building a contact form for a static site with Next.js
By Timo Hillmann•Aug 19, 2021•3 min read

Next.js is a React framework created by Vercel for developing static and dynamic web applications. It takes care of a lot of important concerns when creating a web application, like code bundling and splitting, pre-rendering for performance and SEO as well as server-side code to connect your React app to to your data store.
RelayForms is a low-code form backend which handles any form submissions on any website or web application. It is ideal for static sites built with Next.js and allows you to quickly set up any form without writing your own form backend.
In this blog post, we’ll cover how to add a simple contact form to your Next.js site using RelayForms.
How to build a Next.js form with RelayForms
Step 1: Sign up to RelayForms and create a form
If you haven't already, sign up to RelayForms here.
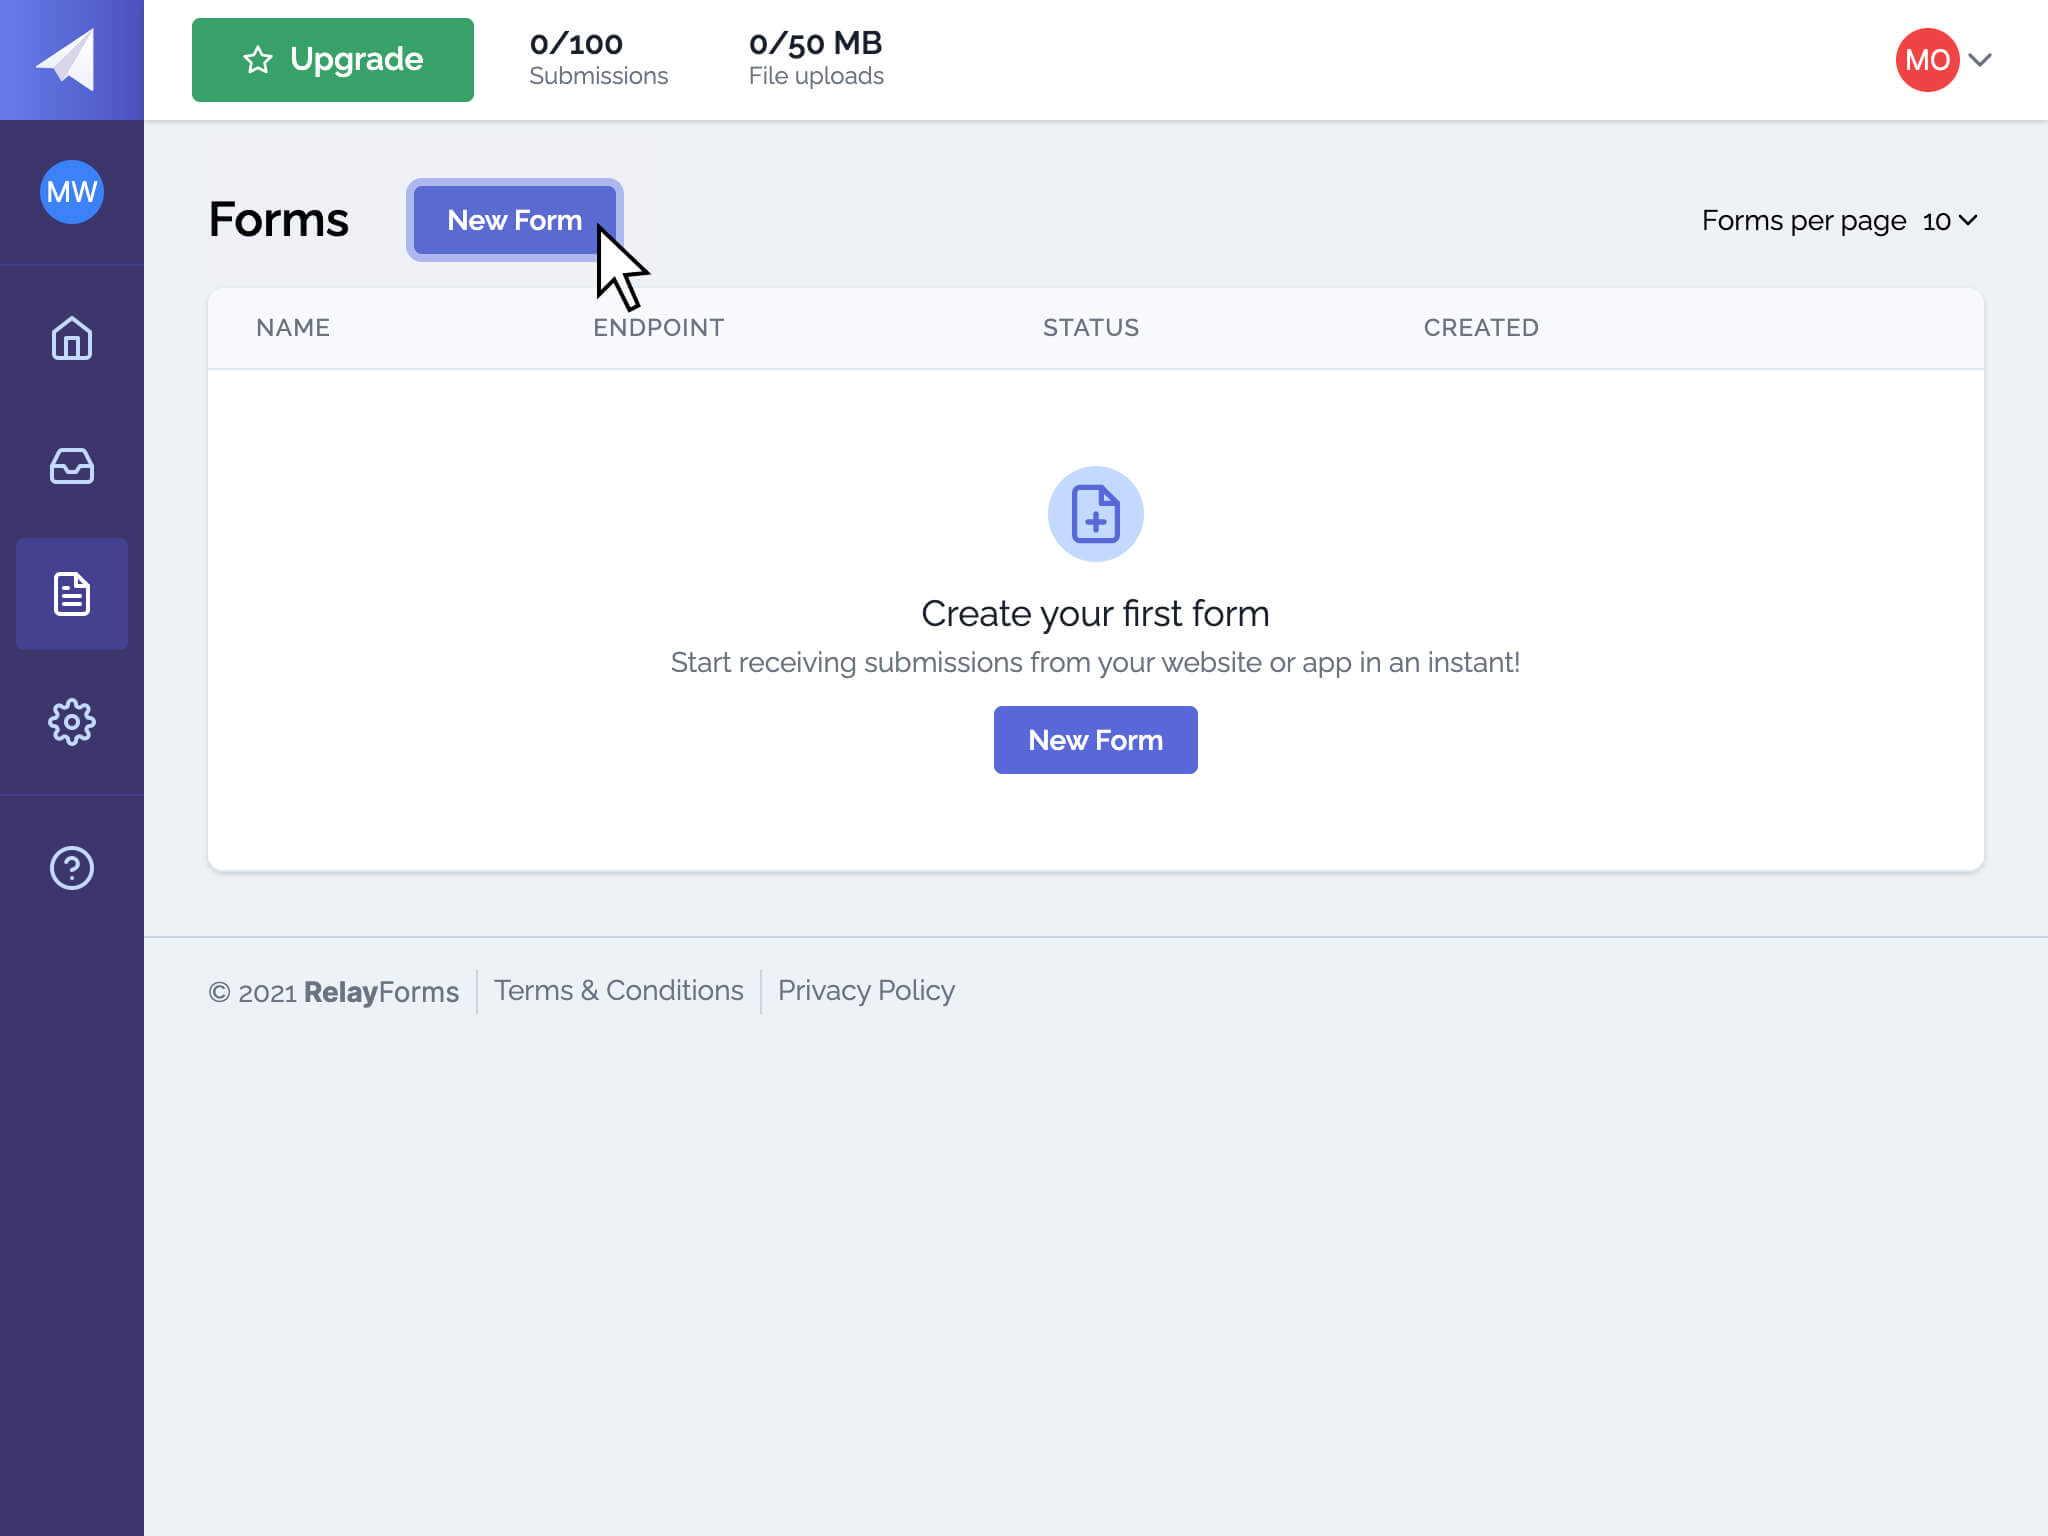
After you've signed up and verified your email, you can create a new form by clicking the forms tab.
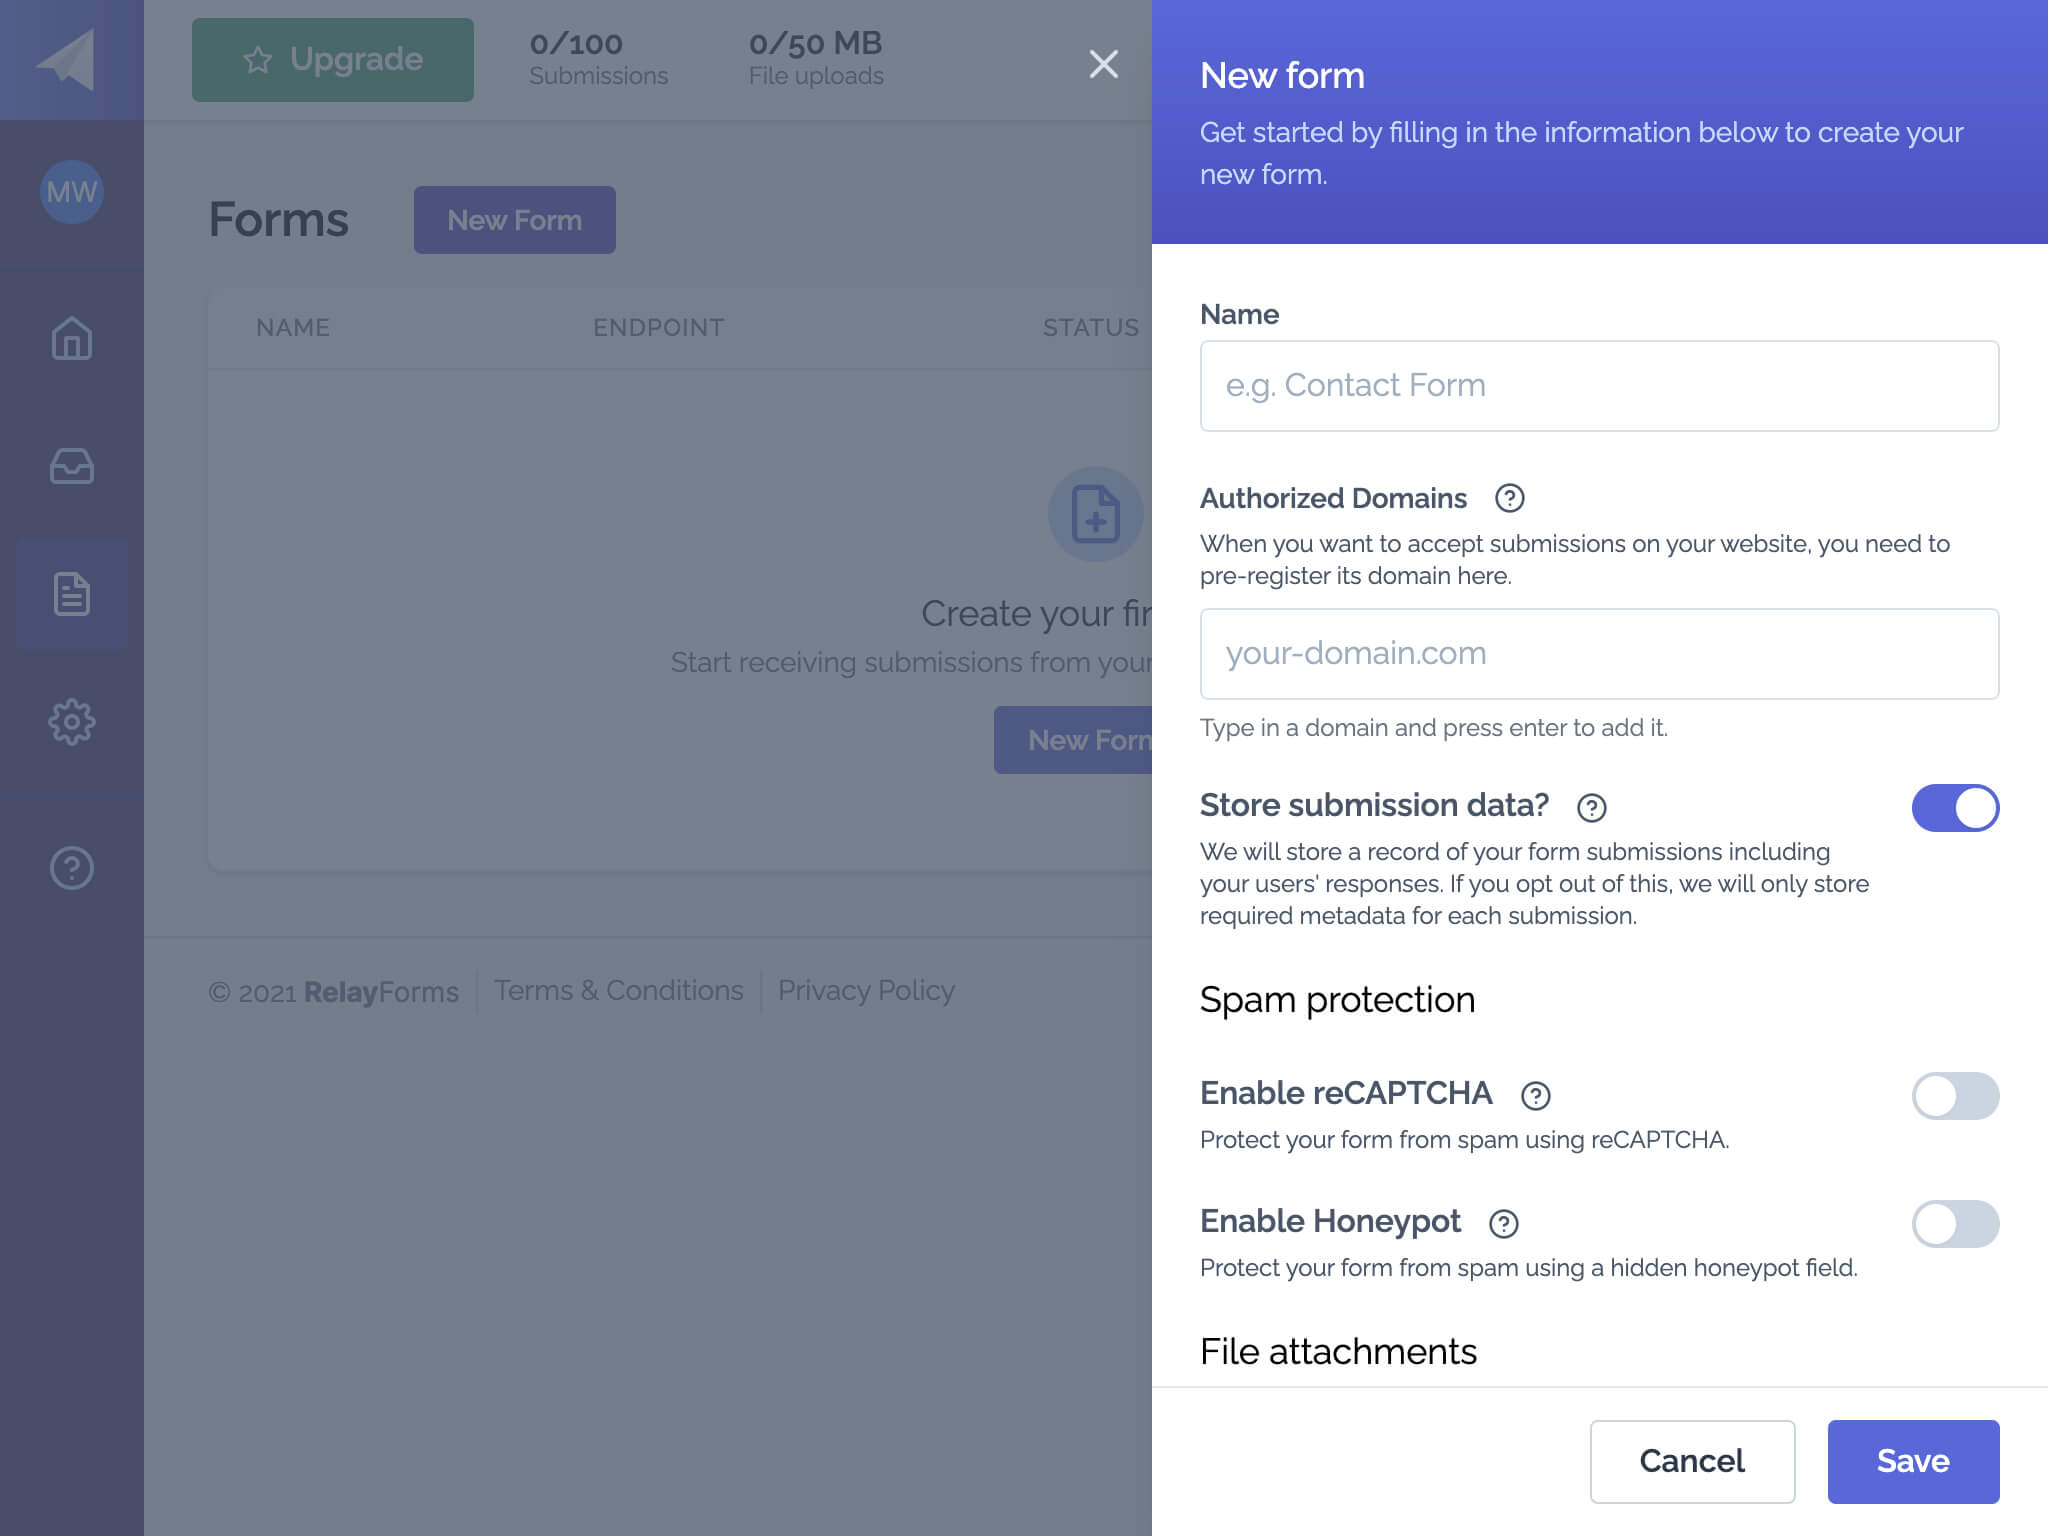
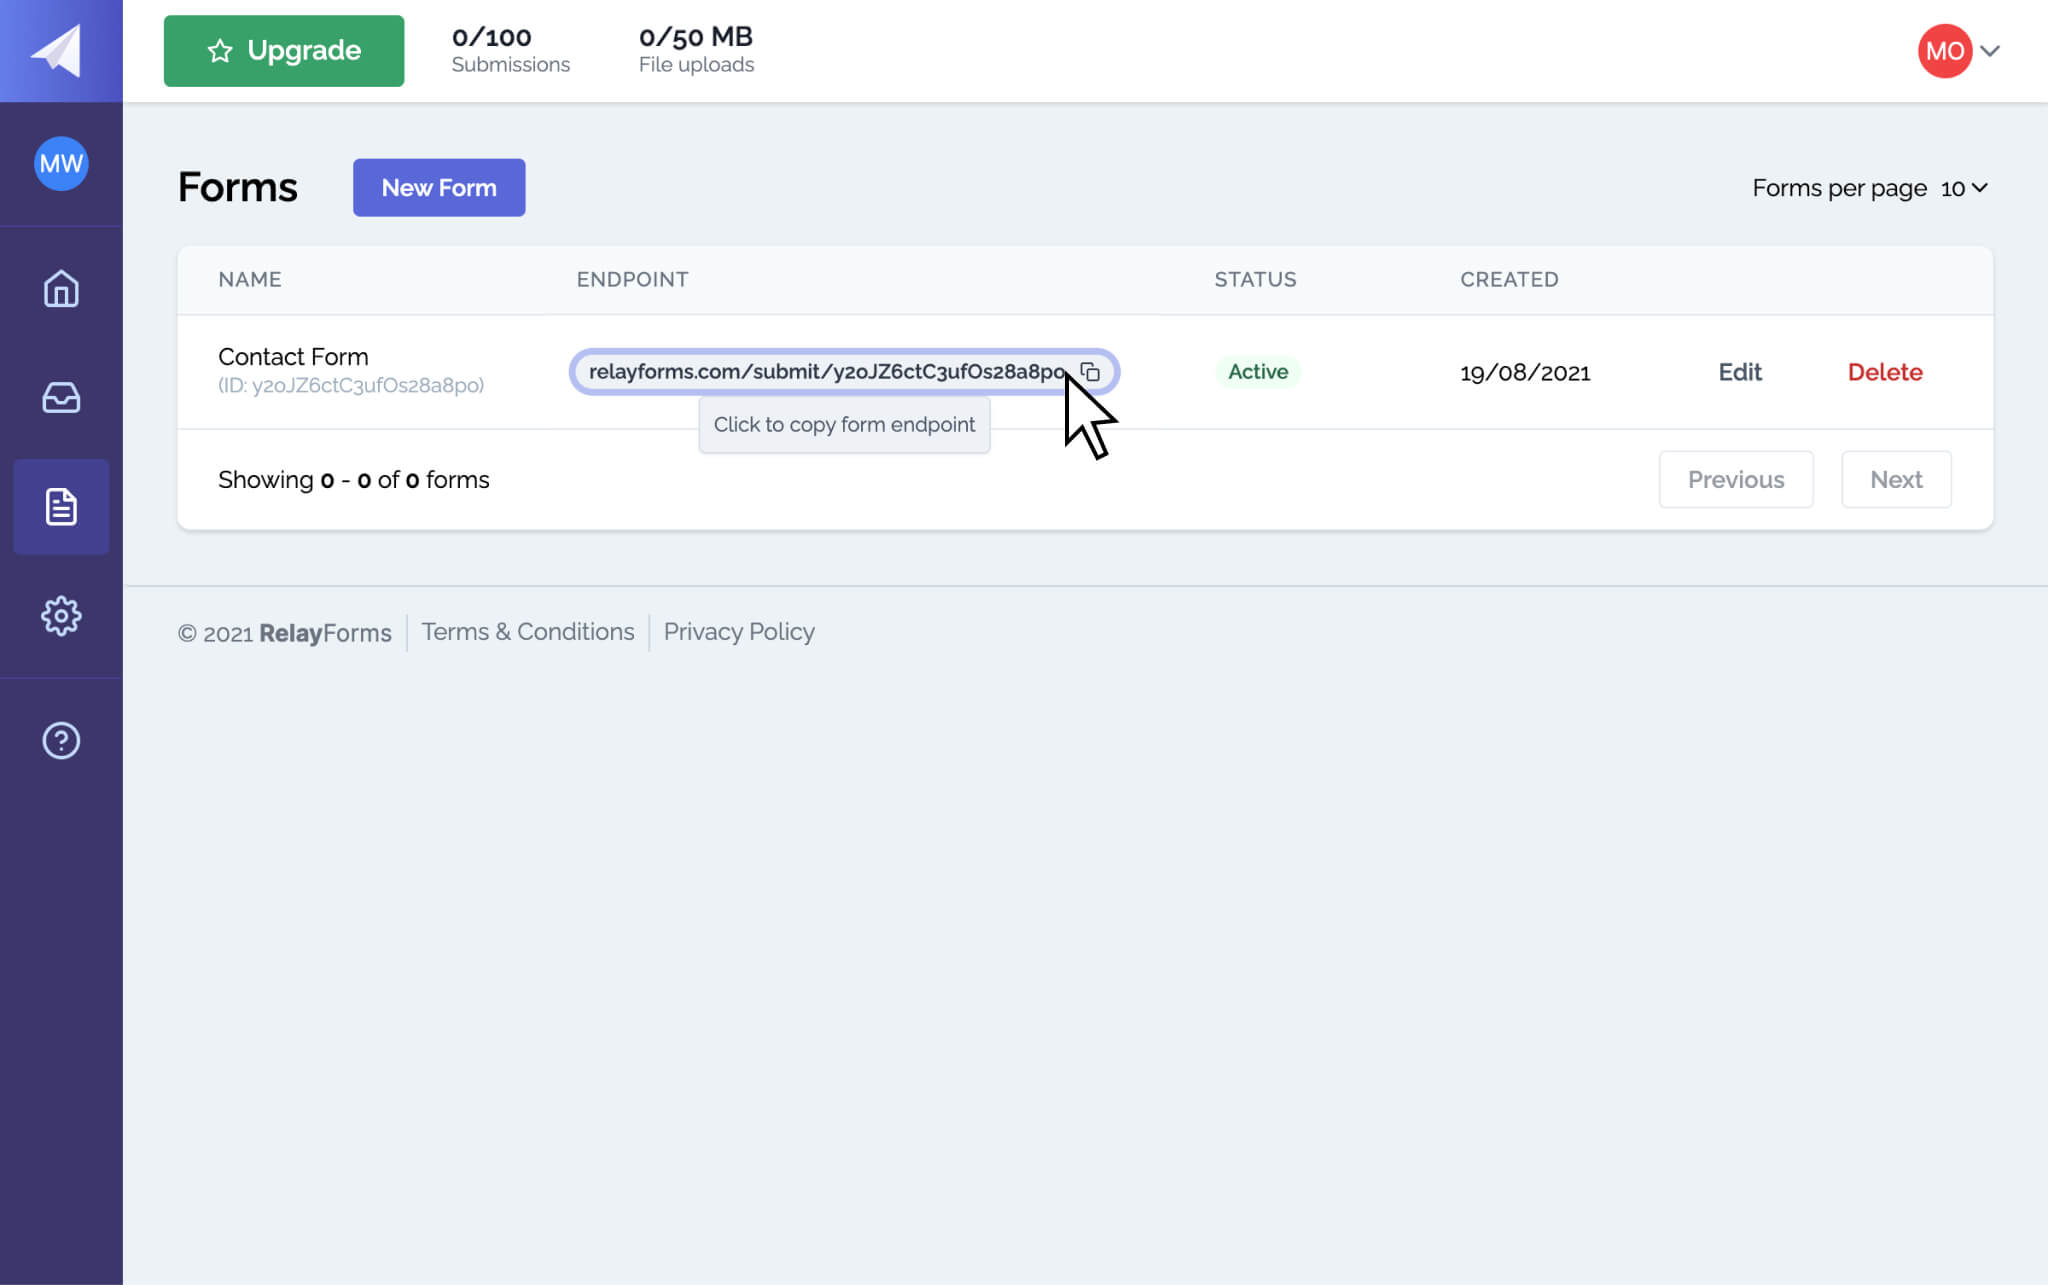
Give your form a name and add your website's domain as an authorized domain. After the form is created, you can copy your unique form endpoint for later use.
Step 2: Create a Next.js app
In case you haven't done yet, go ahead and create a new Next.js app by running:
$ yarn create next-app my-project
# or
$ npx create-next-app my-project
You can replace my-project with the name of your project. In this example we are just going to go ahead with my-project.
Once Next.js finishes installing its dependencies, navigate to the project folder and start the dev server:
$ cd my-project
$ yarn dev
# or
$ npm run dev
Step 3: Add an HTML form to your Next.js app
Now that we have our app, we can go ahead and implement our contact form. This is really up to you - contact forms can be as simple as just an email address and a message field or you can include a variety of other fields to gather more important data. When it comes to building forms there are a few things to look out for though, so check out our blog post on 5 things to consider when creating web forms.
In this example, we are asking our website visitors to fill out their name, email address and a message field. So let's go ahead by creating a new page in the pages folder called contact.js:
// contact.js
export default function Contact() {
const [name, setName] = React.useState("");
const [email, setEmail] = React.useState("");
const [message, setMessage] = React.useState("");
function handleSubmit(ev) {
ev.preventDefault();
fetch("https://relayforms.com/submit/{your-form-endpoint}", {
method: "POST",
headers: {
"Content-Type": "application/json",
},
body: JSON.stringify({
name,
email,
message,
}),
})
.then((res) => {
console.log(res);
})
.catch((err) => {
console.error(err);
});
}
return (
<div>
<h1>Contact us</h1>
<form onSubmit={handleSubmit}>
<label htmlFor="name">Name</label>
<input
type="text"
id="name"
value={name}
onChange={(ev) => setName(ev.currentTarget.value)}
/>
<label htmlFor="email">Email</label>
<input
type="email"
id="email"
value={email}
onChange={(ev) => setName(ev.currentTarget.value)}
/>
<label htmlFor="message">Message</label>
<textarea
id="message"
value={message}
onChange={(ev) => setName(ev.currentTarget.value)}
/>
<button type="submit">Send message</button>
</form>
</div>
);
}
There are a few things to consider here:
- We are storing the state of each field in a separate
useState. - We are using the native fetch API to make the request to RelayForms. Alternatively, you could just do a classic form post.
- As you can see, we don't really care too much about styling in this example.
- You'll need to replace
{your-form-endpoint}with your actual form endpoint from the form creating in step 1.
Step 4: Test your form!
Your contact form is now ready to receive submissions, so go ahead and try it! After hitting the submit button, you should be able to see a new submissions in your submission tab.
Ready to get started?
You can do much more with RelayForms! From enabling file uploads to setting up complex workflows that execute on every submissions, RelayForms got you covered. And if you liked this blog post, feel free to follow us on Twitter.